
Serum is probably the most popular VST synth of our time. It sounds great, looks stunning, is easy to understand, plus there are plenty of Serum presets and skins available. Since not everyone knows how to install Serum presets I decided to write this tutorial for you guys.
Fortunately, it doesn’t matter if you’re using Mac or Windows, Ableton or FL Studio.
The process is always the same!
Open Serum’s Presets Folder
Start by opening Serum.
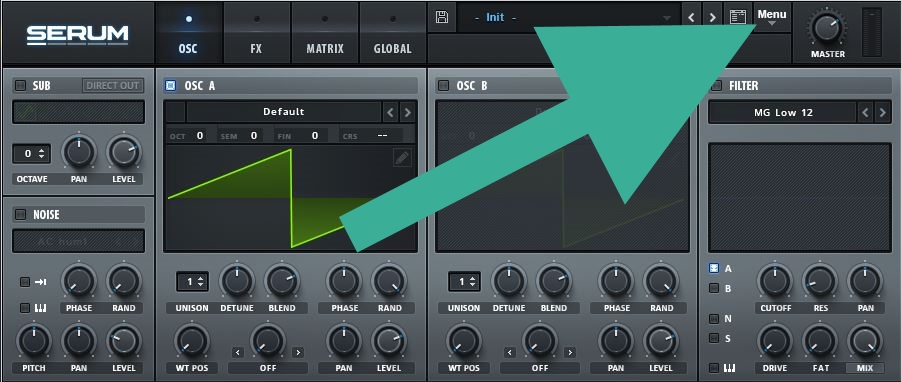
Now go to the menu in the top right corner and click “Show Serum Presets folder”.
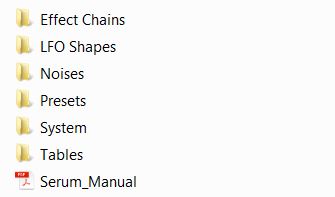
You should see these folders (this screenshot is a bit old by now, so you should see some additional ones):
If you can NOT find Serum’s preset folder there’s a good chance you haven’t installed a legit license, so make sure to purchase one. It’s worth it 😉
Paste Your New Presets
Now paste the pack you’d like to install in the presets folder. Some preset banks may come with additional LFO shapes, noises, wavetables or skins. Just drag each of those categories in the matching folder, too. Wavetables go to “Tables”, noises go into “Noises” and so on.
Have fun
Go ahead and open Serum. You’ll find all patches in Serum’s browser. If you can’t open some of the presets you probably haven’t installed the latest update yet.
..and this is how to install Serum presets! Easy, right? 😉