So you came across the 420 (or whatever it’s called) track by Macintosh Plus and want to learn how to create something similar? Great, in this post you’ll learn how to easily make Vaporwave music – step by step. Let’s dive right into this.
Step 1: Pick a Sample
Vaporwave music usually relies on old samples from songs that have been released in the 80s. Unfortunately, it can get quite hard to get the rights to use these songs for your own music, so alternatively you could pick a melodic loop from our new Vaporwave sample pack or our previously released Synthwave pack. Both (just like all of our products) are 100% royalty-free so you don’t have to worry about any copyright problems! However, if you don’t plan to release the song and just want to show it to your friends you can choose any random song you’d like to work with.
Step 2: Slow it Down
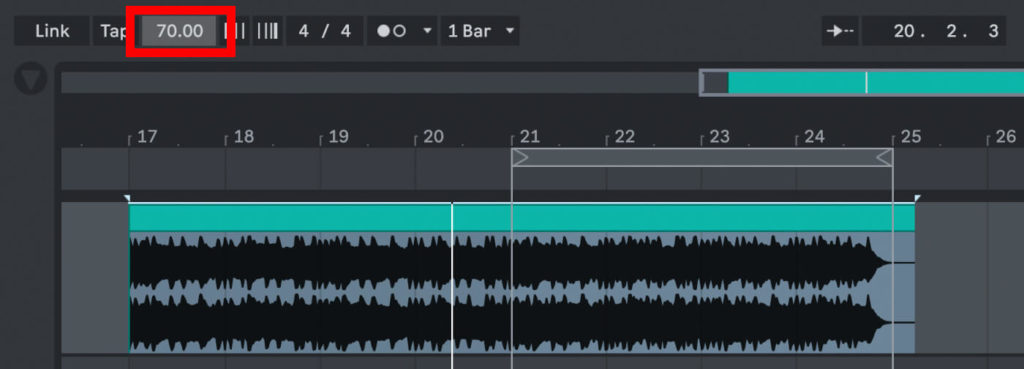
Once you have picked a cool sample or song, open up your DAW (I’m using Ableton Live), create a new audio track and drag it onto the arrangement. Next up you need to find out the original tempo. All of our loops are BPM labeled, so this shouldn’t be a problem, but if you need to find out the tempo on your own you can use a tool like Tap for BPM.
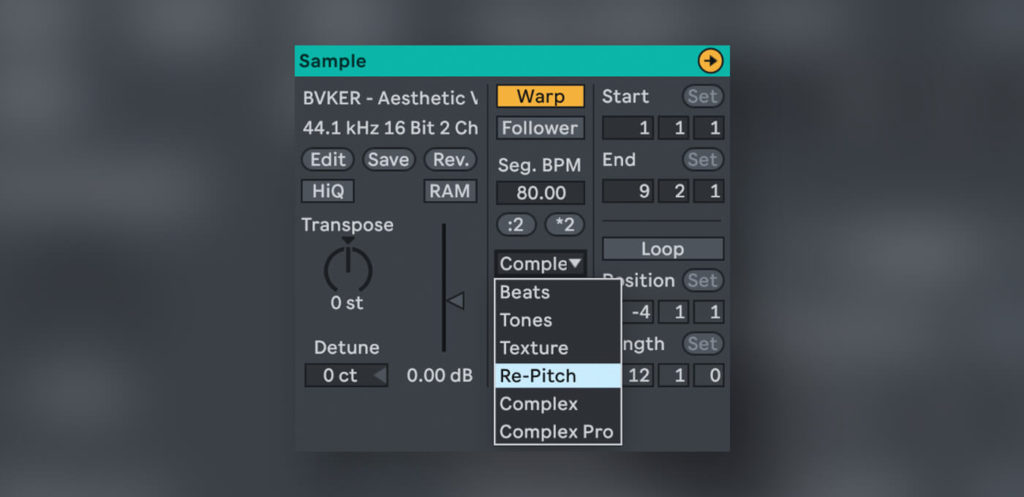
Adjust the tempo of your project file accordingly, align your sample with the grid and enable the “Warp” knob you’ll find in the clip view. Now select the Re-Pitch mode from the drop down menu. Once you’ve set everything up like this you can simply slow down the tempo of your project in the top-left corner until the sample sounds slow and low enough to you.
Now take a few bars of your sample (for example 4) and delete everything else. Duplicate those bars a few times so they repeat over and over again. This is the main sample your whole song will be based on.
Step 3: Add Drums
Since your loop probably sounds a bit boring on its own, it’s time to add drums. Synth- & Vaporwave producers usually use drum shots from old drum machines, like the E-mu Drumulator or Linn LM-1 for example. However, there’s certainly no need to buy one of those expensive hardware units nowadays. In fact, you don’t need to spend any money at all to get some decent 80s drums. For example: our Aesthetic Vaporwave drum kit is completely free.

Once you got a decent selection of drum hits, pick a few one shots you like and try to come up with a pattern that matches your loop. Optionally you can also pitch those samples down a few semitones down, so they also have the typical, lo-fi / vaporwavish vibe.
Step 4: Arrangement
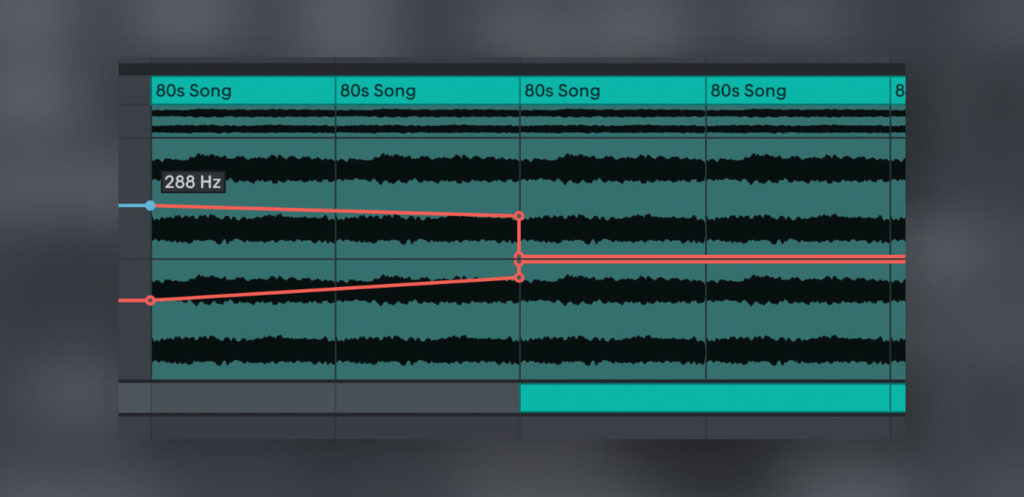
If you’re happy with the loop and the drum pattern you’ve created, you can start messing with the arrangement. Start by duplicating your loop a few times until the duration of your song exceeds a few minutes. If you’re super fancy you can even pick another section of the original song for some variation here and there. Now add a low-pass and a high-pass filter to your master and draw a few simple automations. Slowly introducing the low and high-end this way for example is a great way to create an intro.
Optionally you can add additional effects like delay or reverb or even add your own arps or leads. However, the original Vaporwave is basically just slowing 80s songs down so it’s completely ok to not add any additional melodic elements.
Conclusion
Vaporwave is probably one of the easiest genres to produce. Just ask your parents for the music they listened to in the 80s, slow down one of those songs, loop a section and add some additional drums or automations. If this sounds too boring for your taste and you want to come up with your own chords, melodies and basslines, Synthwave might be a better choice for you, so feel free to check out this tutorial as well.