

If you’re into music production for a while now you probably heard of reverb plugins like the Pro-R by FabFilter, some Lexicon emulations or basically everything from Valhalla. Well, one reverb not a lot of people are talking about (yet) is the AI driven smart:reverb by sonible.
According to the developers website it somehow “delivers custom-tailored reverb by adjusting its processing to the individual characteristics of the input material”. I’m not exactly sure what this is supposed to mean at this point, but I’m sure we’ll find out in the course of this review. Is it maybe even the best VST reverb you can currently get your hands on?
First Impression

By loading the video, you agree to YouTube’s privacy policy.
Learn more
So the first impression I got from the smart:reverb was on sonible’s website. Since it looks really stunning and professional I already was positively inclined. I watched the embedded video, scanned the website and while one part of me thought that this whole AI thing might just be a marketing gimmick I was genuinely interested and decided to go for the 30 days trial.
The installation process was easy and right after opening the VST reverb for the first time the plugin surprised me with a step-by-step tutorial, explaining what every knob does. This and the tooltips are without any doubt 2 things more plugin brands should copy.
All-in-all my first impression of the smart:reverb was really good. The plugin is advertised promising, everything looks fine and the beginners walkthrough is great.
Features
So in order to test the smart:reverb I just picked a random top drum loop taken from our latest Lo-Fi drum kit “Afterlife”. I added the reverb and it immediately sounded quite good, just like most reverbs do. I could already adjust parameters like the reverb time, pre-delay and some other stuff, but to “enable” the pro features I had to analyze my input signal first (guess this is where the AI comes into play).
The Learning Process

Since the snare is the most prominent part of the top loop I picked the “Snare”-profile and hit the record button in the top-left corner, which starts the learning process. After 2 or 3 seconds the reverb actually sounded a bit different + all the advanced parameters lit up.
X-Y Pad
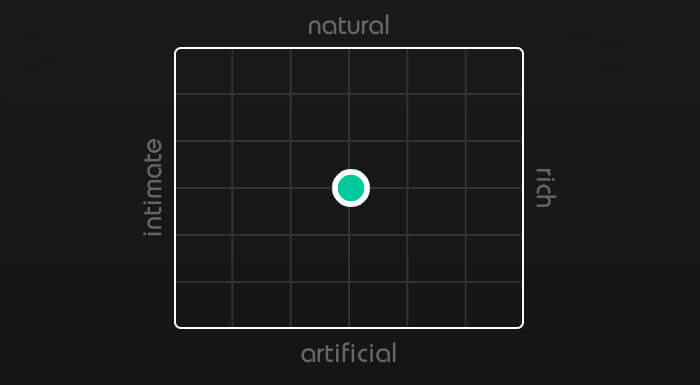
Once the learning process was finished I went right to the X-Y control pad, which allows you to seamlessly morph between artificial, natural, intimidate and rich sounds. In my understanding this pad acts as a macro controlling all advanced parameters at the same time (Decay, Spread & Density). I personally really enjoyed all sounds around the natural-rich corner, but that’s just my personal preference and you might prefer something else.
Advanced Controls

What’s special about the smart:reverb are the advanced controls. Decay, Spread & Density can be controlled with something that reminds me of a synth envelope. This means that you could set the VST reverb up to start narrow and spread while it decays for example. The decay “envelopes” are further split into 4 frequency bands, which allows you to set up some really interesting sounds.
I personally like natural sounding reverbs so I probably won’t use the “envelope” curves a lot, but they’re definitely nice to have and I haven’t seen anything similar yet.
Basic Controls
The smart:reverb certainly also comes with basic reverb parameters, including reverb time, pre-delay, dry/wet, width, color, clarity and a simple filter section. Except reverb time and pre-delay all basic parameters can be reset via double-click + you can type in values with your keyboard. What I really like is that you can control dry & wet using two separate parameters, but also have the option to link them so they act as one dry/wet knob. Most reverbs only offer one of both options. The developers also thought about a reset button, bypass, a/b, presets and undo/redo buttons.
In contrast to some other plugin brands, sonible made sure to include a lot of little workflow features allowing you to have an outstanding user experience.
Workflow
After testing the smart:reverb on a bunch of different sources sounds I eventually came up with a workflow, that works out quite good for me:
Load up the plugin and adjust the reverb time. Start the learning process and go through the different sound profiles (universal, drums etc.) until you find the best one for your source. Now play around with the X-Y pad until you find a decent spot and adjust width, color & clarity if needed. Finally: fine-tune the reverb time and adjust the pre-delay.
The reverb should already sound quite good by now, but if you really want to dive deep you can mess with the advanced, envelope like controls. If you feel like you just worsened the sound you can always click the “smart state” button in the top-left corner to reset your custom changes.
Conclusion
The sonible smart:reverb looks clean, has a great sound and comes with some innovative features you won’t find anywhere else. While it’s easy to set up great sounding reverbs you can also fine-tune the sound and get unconventional results using advanced controls. Everyone who uses this plugin will eventually notice that the developers took all the necessary steps to ensure a great user experience. In my opinion the smart:reverb is clearly one of the best thought-out and most innovative plugins that have been released this year.
Pro:
- Great Sound
- Clean Design
- Easy-To-Use
- Advanced Controls
- Outstanding Workflow
Contra:
- Might be a bit pricey for beginners