
The mvMeter2 by TBProAudio is a metering plugin, which visually reminds of an old VU meter. It comes with multiple measuring modes, including PEAK, RMS, EBU R128, VU or PPM and a bunch of useful workflow parameters. Being available both Windows and OSX, the plugin can be downloaded for free via tb-software.com. To learn more, read our full review below.
First Impression
So right after finding out about the mvMeter2, I started the download and initiated the installation process, which was – as with most plugins – quite easy. I opened up the plugin using my DAW of choice and everything seemed to work correctly. The plugin’s default design looks stunning and all knobs work fine.
Overview
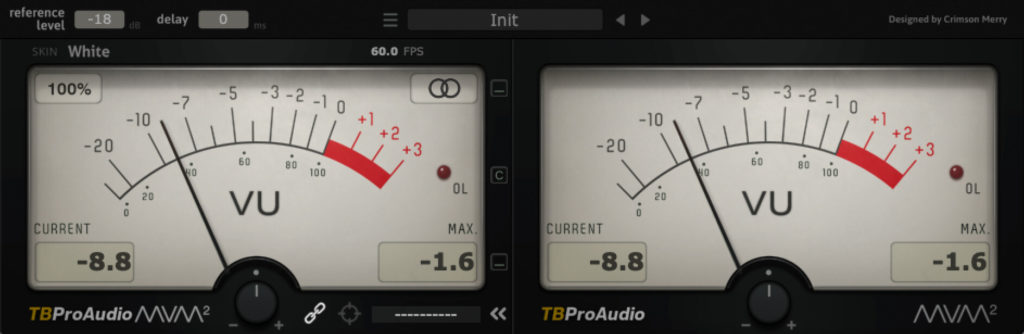
Time to take a closer look at mvMeter2. This is how tot GUI looks like by default:
Top Bar
In the top-left corner you’ll find the reference level, which is pretty useful if you’re going for a specific loudness range, like -14 dB for example. Right next to it, you can delay the meter’s visual reaction (this can be especially helpful while working on projects with a big buffer size).
In the middle of the top bar you’ll find a preset menu with a bunch of useful settings. My personal favorites are RMS K-12, RMS K-14 & RMS K-20, since they really make it easy to adjust your final mastering limiter. If you do not aim a specific loudness range the RMS Standard is also pretty valuable.
Visual Settings
Right below the top bar, in the top-left corner you can change up the plugin’s skin, which doesn’t affect the sound in any way, but is a cool option to have. My favorite style is the “Black” one, but honestly all of them look really great. Fortunately the guys from TBProAudio made sure that the skin doesn’t change while loading presets, so you just need to pick it once. Next up is a parameter, which allows you to change the FPS from 1 – 100. For me, the default setting works out quite good.
Metering Section
The main or metering section is where you can see the needles move. The drop-down menu – once again found in the top-left corner – is where you can adjust the GUI’s size, from 50% up to 400%, which should be more than enough for most users. In the top-right corner of the left display you can decide if you’d like to see the left and right or mid and side signals.
Now the interesting part: by clicking on the left VU meter’s display you can choose one of 7 different measurement modes: peak, RMS, RMS +3dB, EBU ML, EBU SL, VU & PPM. For me, there’s no need to use the peak mode, since my DAW tells me whenever I’m clipping and that’s basically the only peak value I want to know. However, the RMS modes are quite useful to get “a second opinion” on how loud your mix is.
In the bottom corners of both VU meters, you’ll further get values for the current and maximum meter values, which also comes in pretty handy. Additionally there are a bunch of buttons to control the output volume or show and hide certain things, but I’m sure you’ll figure these out on your own 🙂
Final Words
The mvMeter2 is a great tool to check your loudness. Since it comes with presets for the K-System by Bob Katz, you can set it up with just a few clicks and whenever you have a specific setup in mind you can make use of all the different metering modes and other parameters.
Learn more about the mvMeter2 on tb-software.com