

Big labels only release music by artists who already have a following on social media, huge songs and know how the music business works. So the first thing you should do (after making b*ngers) is releasing your tunes on Spotify, Apple Music etc.
Fortunately, it has never been easier to release your own music. However, there are still a few things you should know.
Step 1: Pick a distributor
Distributors are the companies sending your song to all stores & streaming platforms (Spotify, Apple Music etc..). They also make sure that you get paid, your song gets connected to the right artist profile and a few other things.
There are a couple of different distributors you could pick.
My recommendation: DistroKid
Here’s why:
- They’ll get your music into 150+ stores & streaming services
- You can keep 100% of your royalties
- You’ll get paid monthly
- They’re incredibly cheap
Click here to sign up for a DistroKid account!
Step 2: Prepare your files
Before uploading your song you need to prepare these things:
- Song (I’d recommend using a WAV file)
- Song name
- Artist name
- Album cover
- Real names of everyone involved
Have everything you need? Cool, let’s move on..
Step 3: Upload your song
To upload your song to DistroKid you have to click on the “UPLOAD” link at the top menu.

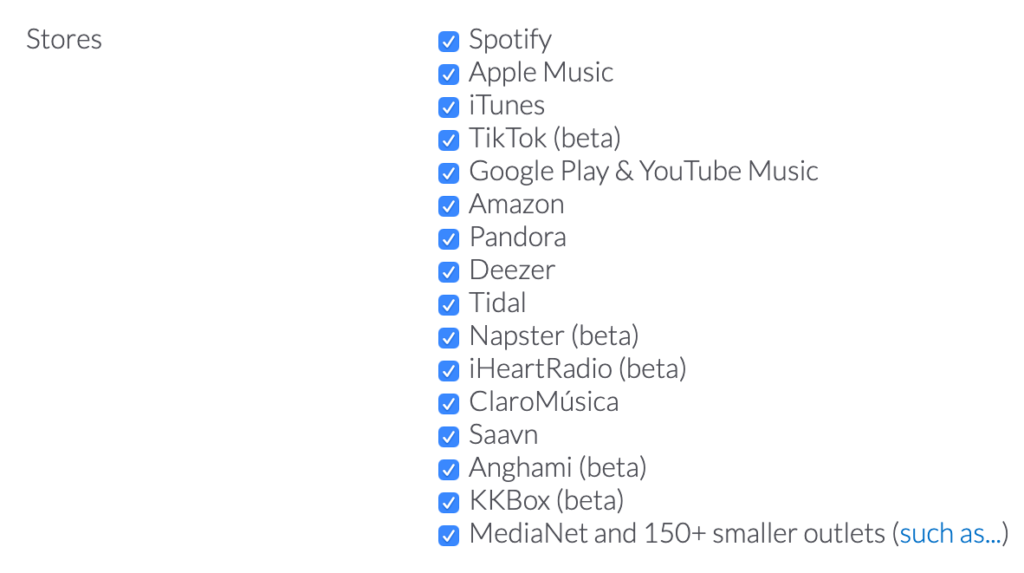
The first things you can pick are the stores / streaming platforms. I recommend to take all of them.
Next up is the number of songs (this point is pretty self-explanatory 😉).

Now you can enter your artist name:

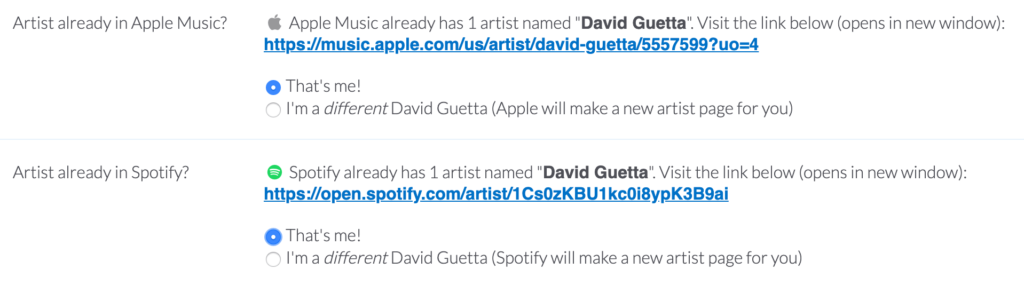
If you have previously released songs on Spotify or Apple Music, DistroKid will automatically find your artist page (I really wonder if they’d allow me to upload a song to David Guetta’s artist page 🤔).
If you haven’t released music yet, you can create new artist profiles.
Depending on the plan you chose you can also select a specific release date (I’d always release new music on a Friday), an iTunes pre-order date and the name of the record label.
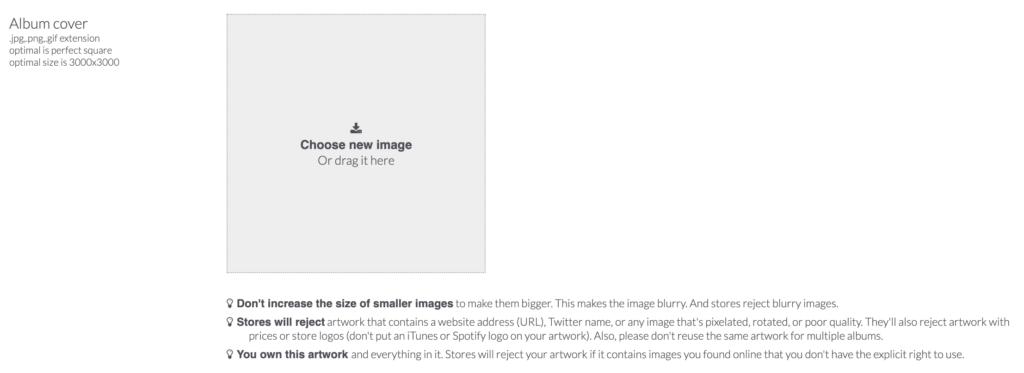
The next step is uploading the cover. I suggest uploading it as a .jpg file (3000×3000 pixels). Please make sure that the cover doesn’t contain any links, user names, prices or store logos. Otherwise some stores might reject your release.
Pick the language of your release:

If you’re making any kind of EDM the primary genre is usually “Dance”. Rappers should pick “Hip Hop/Rap”. You can also select a secondary genre.

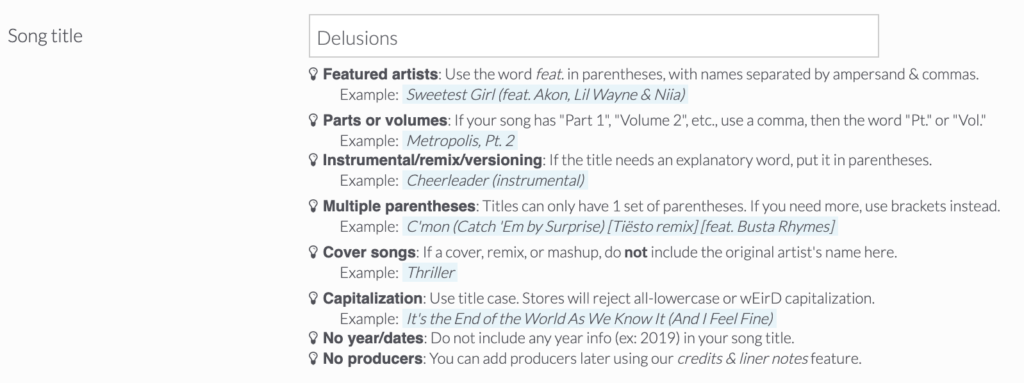
Time to enter your song name (don’t forget to read their guidelines so you won’t make any formal mistakes).
After uploading your audio file you have to fill in THE REAL NAMES of everyone involved in writing music or lyrics.

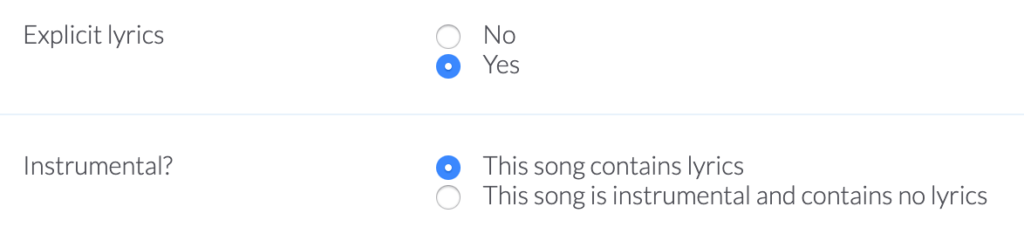
DistroKid will also ask if your song contains explicit lyrics or any lyrics at all.
Step 4: Time for some extras
I’d always pick the “Instagram & Facebook” option (it allows your fans to share your music to their stories).

I’d NOT pick the “YouTube Money” option, because this will monetize any uploads of your song, which s*cks if you want to submit your song to promo channels, such as Trap Nation (they usually want to monetize the upload on their own).

Don’t forget to pick the “Shazam & iPhone Siri” option, because it makes it easy for people to identify your song if they hear it somewhere (it only costs $0.99/yr).

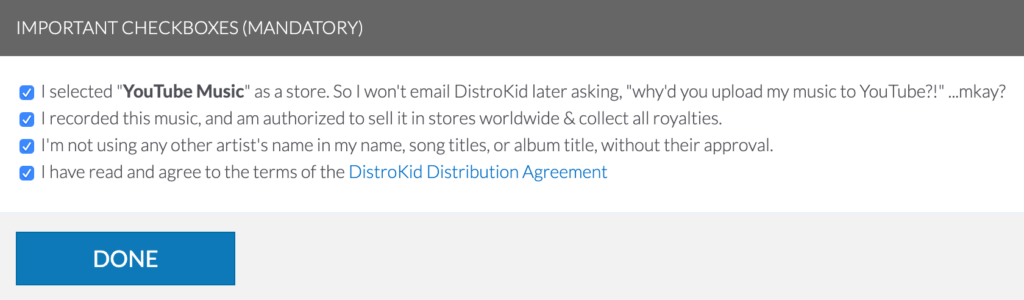
Now all you have to do is enabling all the mandatory checkboxes and click on “done”.
That’s it 🙂
BTW: If you haven’t signed up for a DistroKid account yet, feel free to use this link to get 7% off your first year’s membership.