

In this post I want to share my 5 step formula, I used to master countless songs for clients, friends and myself (actually I still use it).
Let’s go:
Step 0: Reference tracks
Before you start adding effects to your master you should pick 2 or 3 professionally mastered reference tracks from the same genre. Drag those songs into the project file so you can compare them to your own track.
There are also some reference plugins on the market that can be useful, but they’re definitely not necessary.
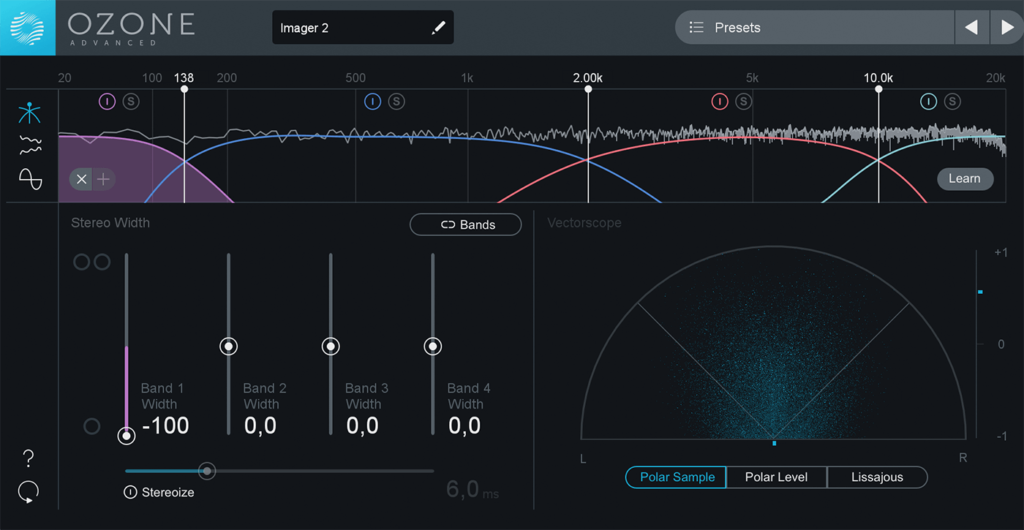
Step 1: Make the bass mono
The first thing I always do is making the bass mono. If you own a copy of Ozone you can simply pull down the width of the lowest Imager band.
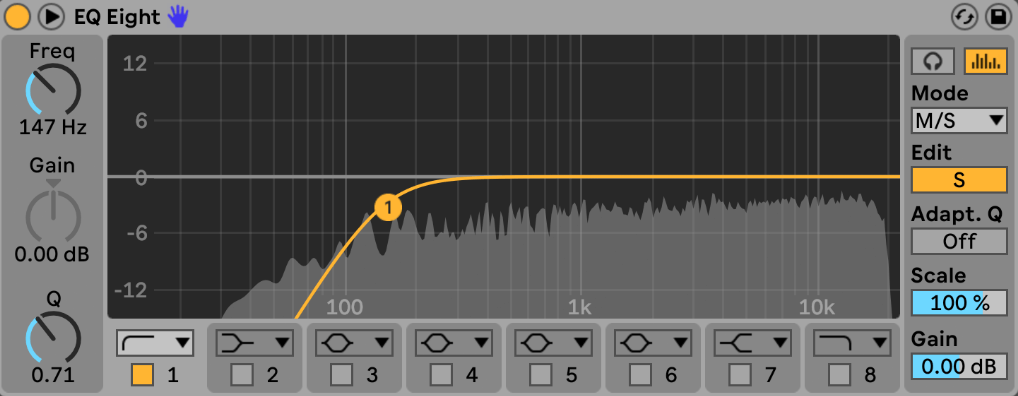
Alternatively you can insert a mid/side EQ and add a high-pass filter to the sides (80 – 150 Hz).
If you added the Ozone Imager you can also try to increase (or decrease) the width of the other frequency bands at this point.
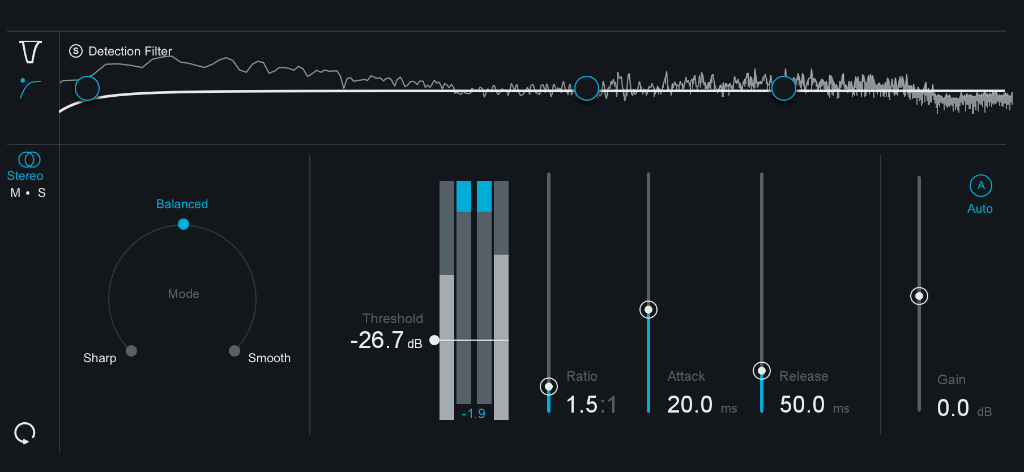
Step 2: Bus compression
If your track is already mixed good you won’t need much compression on the master. I usually choose a slow attack and fast release time with 1 – 3 dB of gain reduction. This can help to “glue” the mix together.
Step 3: EQing
At this point, the reference tracks come into play. Make sure they are the same volume as your track (otherwise you won’t be able to compare them properly) and try to hear which frequencies you have to cut and which ones to boost.
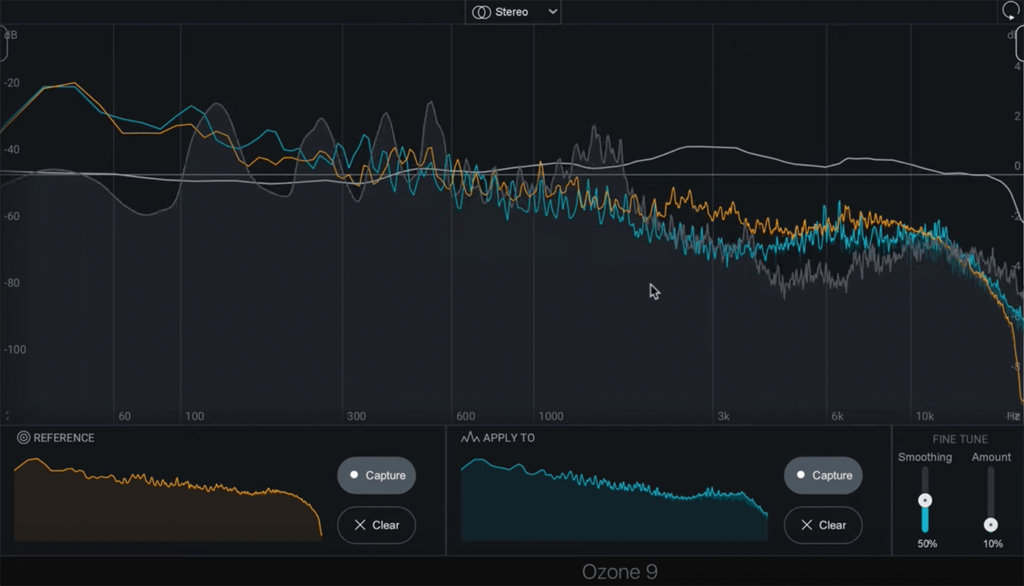
This can be tricky, especially when you’re just starting out. Fortunately, Ozone comes with a tool that helps us with this:
The match EQ analyses a reference track of your choice + your own track and automatically applies a curve that makes your song sound similar to the reference track.
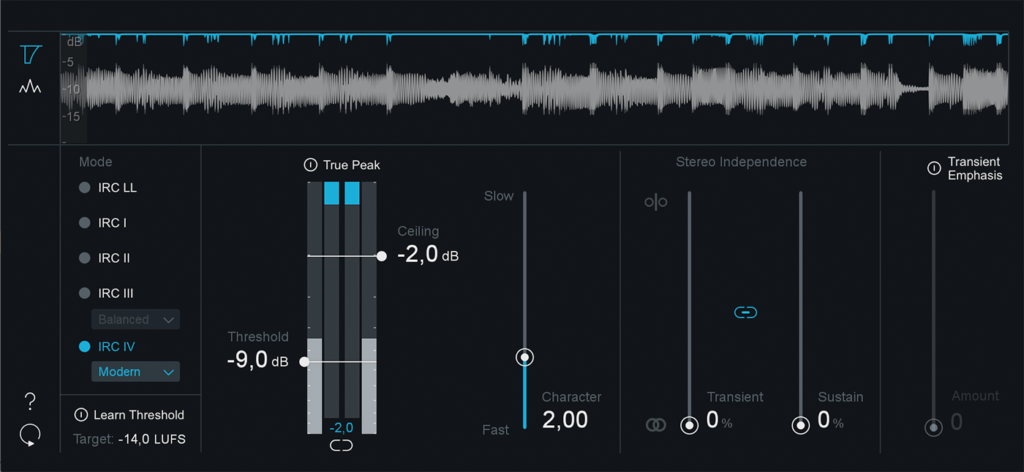
Step 4: Make it loud
The final mastering step is adding a limiter to make your track loud. Set the ceiling to -2dB (this is recommended for streaming platforms like Spotify) and decrease the threshold until your track starts to distort.
Now dial it back a bit.
You can also adjust the release time. The algorithm I chose most of the time is “IRC IV Modern”, but feel free to play with the other options.
Step 5: Do the “car test”
Now it’s time to listen to the track on different sound systems (car, headphones etc.). Write down what bothers you, come back to the master and fix it.
There’s a lot more to know about mastering and this post only covers the basics, since I didn’t want to overwhelm you with tons of new information. However, I think it’s a great start and if you go through all of those steps you should get a decent result.
You want a professional to master your song?
No problem! I have years of experience and I’m always happy to help. Feel free to send me a mail with your inquiry 🙂