
LoFi music is awesome! You can listen to it while studying, driving the car, relaxing or when it’s just a rainy day and you want to spend the day at home.. but before I’ll tell you how to make a LoFi beat let’s talk about what LoFi is in the first place.
LoFi music (short for low fidelity, also known as Lo-Fi) is music that sounds like it was recorded with “bad” or old equipment, which sometimes is actually the case, but doesn’t necessarily need to be. Some of those artifacts can be noise, vinyl crackles, distortion or imperfections in pitch and they can usually be recreated in your DAW without the need to buy expensive analog tape machines anything like that.
While the majority of modern producers approach a perfect result, with clean recordings and exact pitch, LoFi producers do the exact opposite.. but instead of just sounding “bad” it actually triggers certain emotions in us like nostalgia or melancholy.
Here’s how to make a LoFi beat (step by step)..
Step 1: Sound Selection
Every genre has its own, unique characteristics so it’s always a good idea to get yourself some fitting drum samples and presets before opening up your DAW. I mean, technically it would be possible to create a LoFi beat with a Dubstep sample pack for example, but let’s put that challenge to the side for another day.
Here are some free LoFi packs you can download before we move on:
https://bvker.com/lunar/
https://bvker.com/free-mellotron-presets-for-serum/
https://bvker.com/foley-factory/
They’re basically filled with everything you need and licensed as royalty-free so you can use them for your own productions without having to worry about copyright problems 🙂
Step 2: Writing LoFi Chords
So now that you hooked yourself up with some fitting sounds we can get to work. I’ll start off with some simple music theory and will later on show you how to make your digital chords sound like real samples + how to actually work with real samples.
The Basics
Since I don’t know exactly how much you already know about music theory I’ll just start with the basics. The first thing you should do is picking a scale. My tip: go for either A Minor or C Major. This way you can use only the white keys (no worries, once you’re done with the chord progression you can transpose it to another key).
In this case, I decided to go for A Minor. This means that the routenote of my scale is A and that I can use all of the white keys to write chords and some nice melodies.
Now I’ll show you how to build chords.
First, pick the keynote. Let’s say an A.
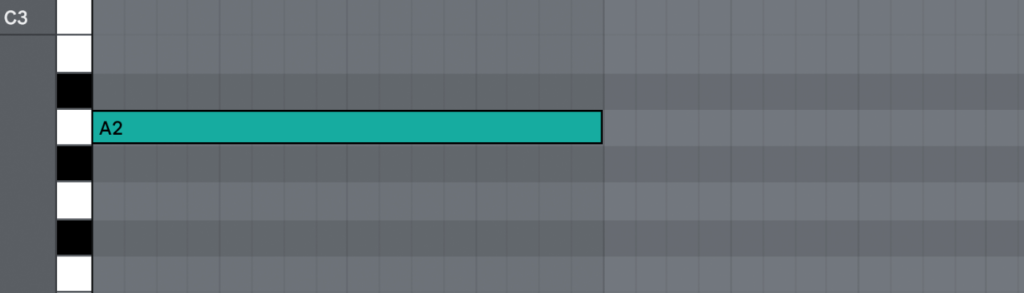
Skip one of the white keys and add a C. Skip a white key again and write an E. This is how an A Minor chord looks like:
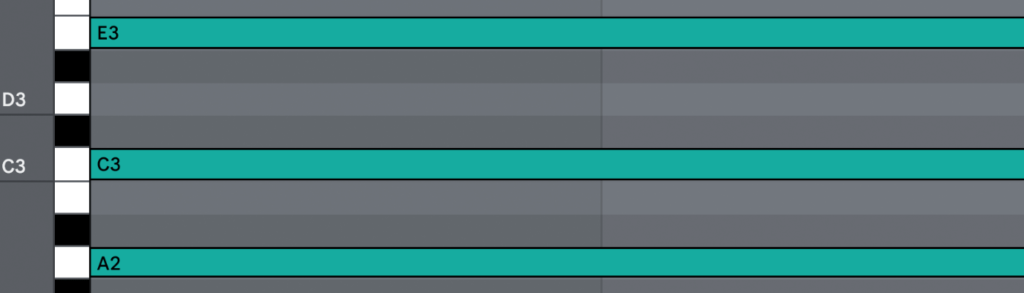
The special thing about LoFi chords is that you can go one step further by skipping another white key and writing a G. Notice how “jazzy” this immediately sounds?
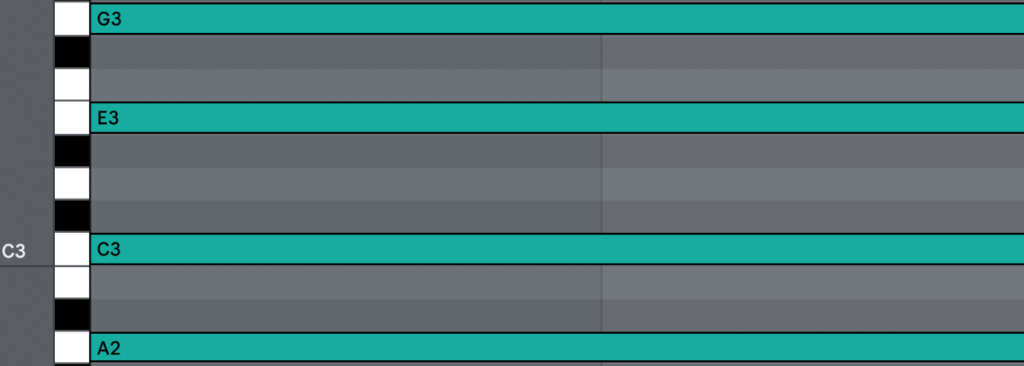
The cool part is that this is basically everything you need to know about writing chords. Just pick a keynote, skip a white key, skip another white key and skip a white key one more time (the fourth note however is optional).
Inversions
Once you came up with a nice chord progression you can try to add some “chord inversions”
Here’s what this means:
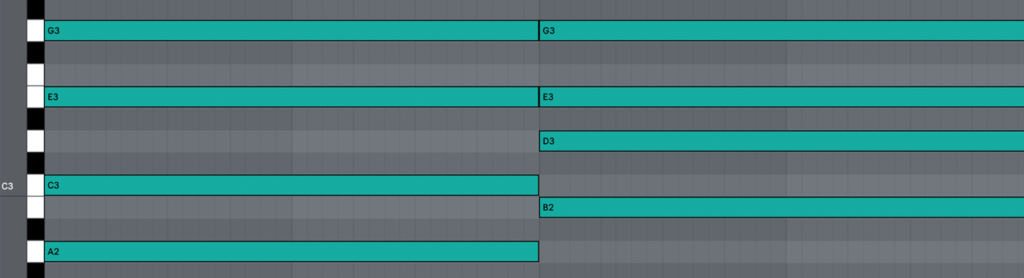
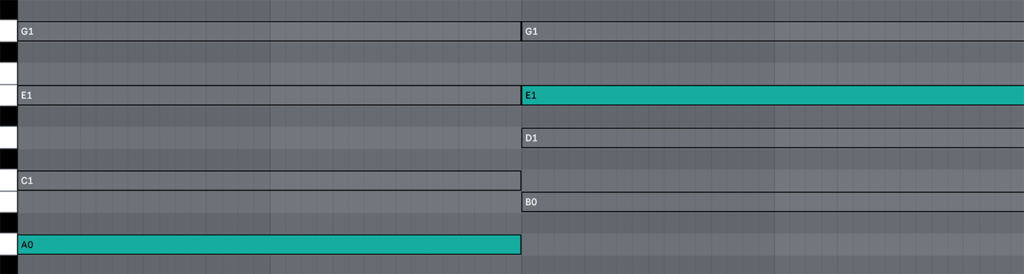
I wrote these two chords using the technique I just described. As you can see, the second chord is significantly higher than the first one. Unfortunately big jumps like this don’t always sound very pleasant.. but that’s not a big deal.
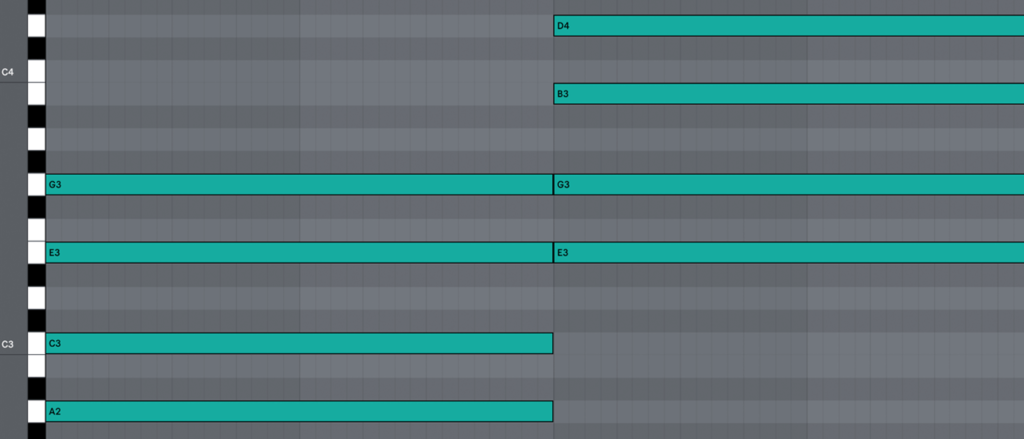
Just take the highest two notes and transpose them down one octave. As you can see they’re still B and D, but the entire chord is closer to the first one.
And if there’s one last piece of advice I can give you it would be this: Not every chord needs to be exactly built like this. Sometimes you want to mute a note and sometimes you want to write a note that doesn’t fit in this scheme. Just experiment a bit until you come up with something that sounds pleasant to your ears.
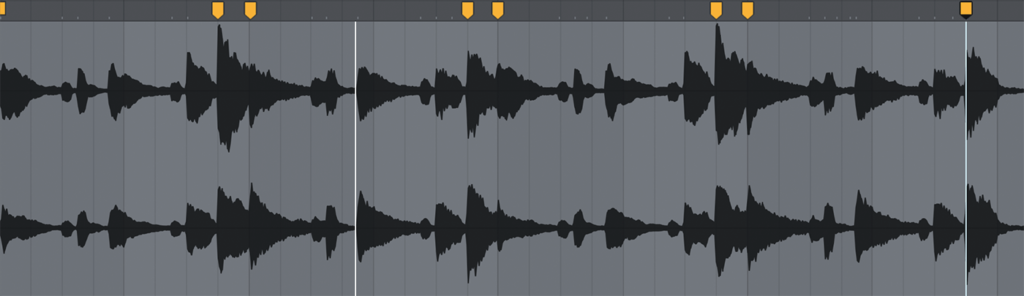
Humanizing
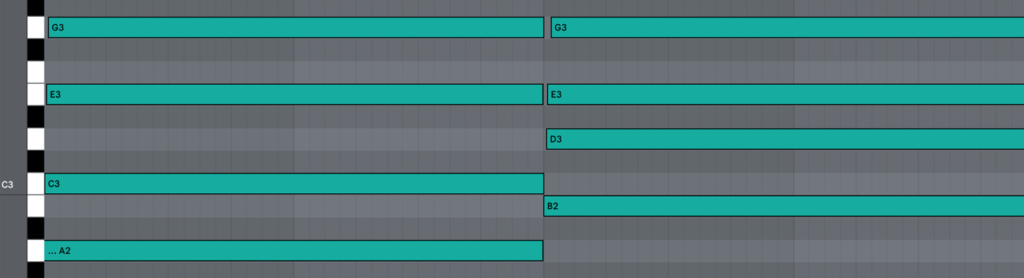
Since every chord we wrote so far is perfectly in time the progression might sound a bit robotic. A real musician would never play perfectly in time like this. So in order to make everything sound more realistic you should disable the grid for a while and drag some notes slightly to the left or right. Once you’re done you can go one step further and play around with different velocity settings. It can be a lot of work until you got everything perfectly right, but small details like this can really bring your song to life.
Sound Design
The next part I want to talk about is the sound design aspect of LoFi music. A lot of times LoFi beats are based on real instruments so you can try to find a nice piano, guitar or brass preset to get started. Once you found a fitting instrument or synth preset it’s time to add effects. For a selection of the best free & paid LoFi plugins check out this post I made a while ago.
Here’s a short overview of the effect categories you might want to add:
Filters:
Old tape machines had a limited bandwidth so you can’t hear a lot of low or high-end in old recordings. To simulate this effect you can cut off your sounds with high and low-pass filters.
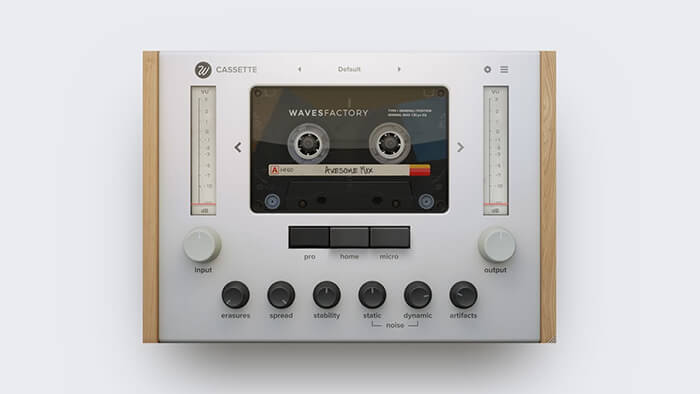
Saturation and Distortion
Another imperfection of old recording equipment is distortion or more subtle: saturation. You can try out different saturation plugins, tape emulations, bitcrushers or downsamplers.
Pitch
While creating a LoFi beat you usually don’t want everything to be perfectly in key, so you can either automate the pitchwheel or add a plugin that gets the job done for you. One of the most popular choices in probably the RC-20 Retro Color by XLN Audio (it also comes with some other cool functions).
Other effects
Other effects you might want to add are modulation plugins like a chorus for example, a reverb or a stereo tool so you can decrease the width. Not every track needs all effects at once and every arrangement is different so just play around with some of this stuff until you find settings you’re satisfied with.
Working With Samples
After picking a sample the first thing you should try is finding the right tempo. As far as I know most DAWs have something like a “tap for BPM tool”, but if yours doesn’t have one integrated you can check out this one here (just tap a key of your choice along with the beat).
Please keep in mind: If you really want to work with a sample you recorded from an old vinyl for example you should be aware that you need to clear the license before you upload the beat to any streaming platforms..
Since old recordings or vinyls in general don’t always run in the exact same tempo you might have to warp the sample later on in your DAW, so you can seamlessly loop it. Ableton Live users can check out this post for further instructions on warping.
Once you got the right tempo it’s time to find out the keynotes of every chord. Load up a simple sound like a grand piano or a sine wave and use your ears to find out which notes sound good together with the sample. Once you found out all the key-notes you can continue working with the sample in the same way you’d work with “your own chords”.
Step 3: Drums
One of the most important tricks for getting the drums right is sound selection. Fortunately you already hooked yourself up with a decent selection of drum samples (if you read through the whole article from the beginning on). Let’s jump right to the drum placement. I’d personally start by placing a snare on every second quarter note.

For a “lazy” feel you can try to delay the snare track by a few milliseconds.
Now pick a cool kick drum and try to come up with a pattern that matches your chord progression. If you have a drum pad or MIDI keyboard try to record the pattern rather than drawing it. If you don’t have access to a MIDI controller right now try to give some of the hits lower velocity settings and try to set them slightly off-grid (each one in a different way). Next up you can add hats and other cymbals.
And here comes the biggest mistake I see a lot of producers doing:
They just pick one of the first samples, stick to it and then try to mix everything.. but why is this a mistake? Because the sound selection needs to be on point before you even think about mixing. So after you came up with a nice drum pattern you should go through all of your samples again and try to find a better kick, a better snare and maybe a hat that fits your arrangement even better.
I know this sounds boring, but believe me: this will drastically improve your mixes! 😉
Step 4: Bass
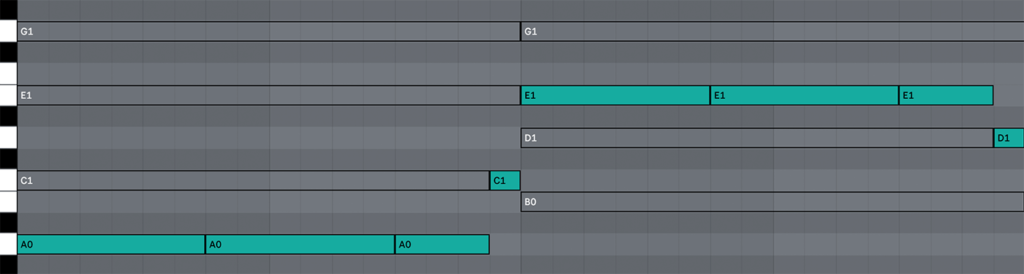
Remember the “music theory” we discussed earlier? Great, because the keynotes of each chord are exactly the notes your bass should play. You can start by copying the MIDI file from the chords to the bass track. Leave only the key notes and delete everything else:
This pattern should work, but probably sounds a bit boring, right? To fix that you can either let the bass play in a faster rhythm like this for example:

Or you simply add some transition notes. Just make sure that these transition notes are always part of the chord that’s playing at this moment. Like this for example:
Regarding the sound selection you can try to find a cool sample of an acoustic bass or you simply pick a pure sine wave (maybe with a bit of saturation).
Step 5: Ambience
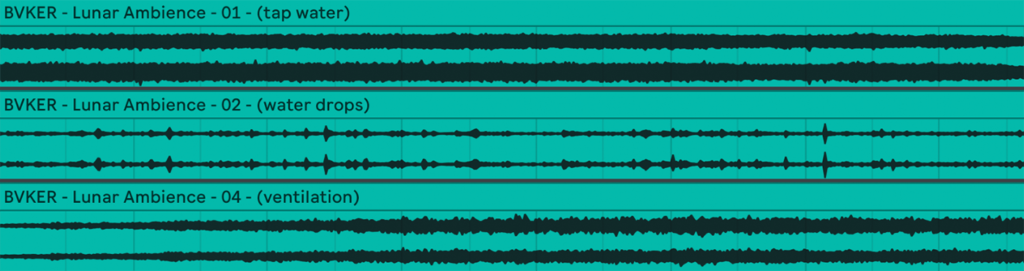
One popular technique among LoFi producers is adding recordings of “real situations” in the background of their tracks. These recordings can be anything like rain, a train station or a bonfire. In order to give your tracks some unique character you can try to record these ambiences on your own. This is typically done with a field recorder, but since we’re talking about LoFi your smartphone should probably get the job done.
Step 6: Vocals
Since LoFi beats are rather depressing and have a sad vibe a lot of times many LoFi producers add vocals from old interviews or televised snippets to their beats. Just search for something like an “old schizophrenia interview” on YouTube. Chopp up the best parts and add them to your track, but remember: If you’re planning to release the song on Spotify etc. you should do your research regarding the copyright. You don’t want to get sued when the track blows up 😀
Step 7: Mixing & Mastering
Ok, let’s say you came up with a nice chord pression, added some cool effects to make it sound “older”. You added some sloppy drums and compared one shots until you found the perfect ones for your arrangement. Ambience recordings and maybe some vocals have been added and you arranged everything until the beat is almost finished.
Time for mixing..
If you’re a producer who usually struggles a bit with mixing I have two great news for you. First, since you already compared dozens of one shot drum samples you probably don’t have to add any effects to your drums. Second, it’s a LoFi beat so it doesn’t need to sound perfect.
Reference Tracks
Pick 2 or 3 good sounding reference tracks that are quite similar to your beat. Drag them into your project file and compare the levels of all individual tracks. This way you can find out if some elements of your mix (the kick drum for example) are too loud.
Once you’ve balanced all tracks it’s time to take a look at the overall frequency spectrum. Has your track to much low frequencies or high end compared to the reference tracks? If your track has significant differences you might want to change that in the mix.
Tip: Don’t try to be too precise while mixing and mastering. It’s still LoFi so your beat doesn’t need to sound perfectly cleaned up and polished.
Mastering
Before you start to slap any effects on the master channel you should be happy with your mix.. and if your mix already sounds good there usually isn’t much to do on the master. Maybe a little bit of bus compression or some tiny EQ adjustment, but that’s it. Add a limiter, set the ceiling to -1 dB (yes this is actually recommended by Spotify) and adjust the threshold/input until the gain reduction starts to kick in a bit.
Don’t drive the limiter to hard when mastering LoFi beats
Conclusion
If you read through the whole post you should know the basics of making LoFi beats. Now it’s up to you. Open your DAW and start playing around with all of those techniques! Reading and learning is fine, but all this information is useless without a lot of practice. Oh.. and if you enjoyed the post you might also like this tutorial on how to make Synthwave.