

Ableton Racks are awesome! They allow you to group effects or instruments, map multiple parameters to a single macro and create parallel chains. I’m using these features to “pimp” Ableton’s stock effects every day so if you’re looking for some free Ableton racks you definitely came to the right place!
Click on the button below to start your free download and make sure to read the entire post for further details. You may also like this list of free Ableton templates.
Click Here to DownloadMastering Rack
When your mixdown is perfect you usually don’t need much processing on the master. However, there are some effects that can help to “glue” all individual tracks together and give you track that final touch. My general recommendation: less is more! If you’re making big changes on your master channel you should probably go back to the mixing stage!
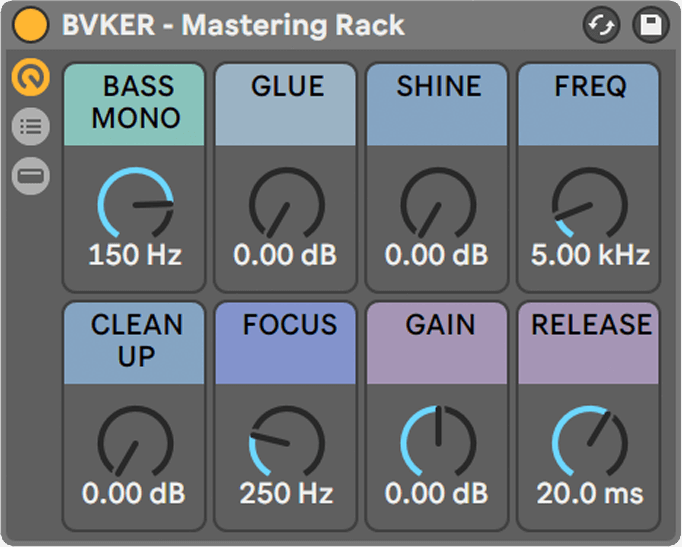
This is what the macros from my Ableton mastering rack do:
- Bass Mono sets a crossover frequency. Everything below will be mono (50 – 200 Hz).
- Glue decreases the threshold of Ableton’s Glue Compressor (0 – -30 dB).
- Shine is a high-shelf filter you can use to boost the side signal (0 – 6 dB).
- Freq controls the high-shelf filter’s frequency (4 – 22 kHz).
- Clean Up reduces low midrange frequencies (0 – -5dB).
- Focus adjusts the exact frequency for “Clean Up” (200 – 500 Hz).
- Gain increases the input gain of Ableton’s limiter (-24 – 24 dB).
- Release adjusts the release time of Ableton’s Limiter (0.01ms – 3s).
I’d highly recommend to pick another limiter like the one from Ozone 9 if you really want to achieve a professional master. However, if you just want to render a quick demo or a rough mix Ableton’s Limiter will probably be good enough.
Vocal Rack
Mixing vocals is extremely complex and a single free Ableton Rack will never be able to make any vocal sound perfect. However, if you’re new to mixing or just want to enhance a rough demo this Ableton Live rack might be something for you.
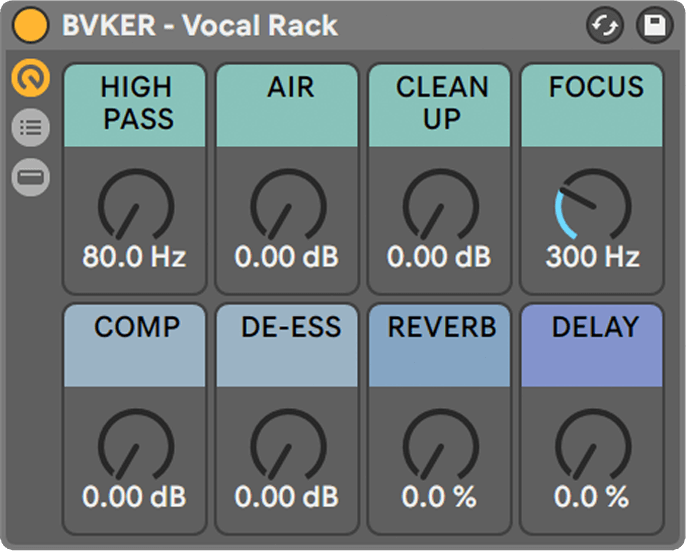
- High Pass controls the frequency of a high-pass filter (80 – 250 Hz).
- Air boosts the top end with a high-shelf filter (0 – 15 dB).
- Clean Up cuts muddy frequencies in the low mids (0 – -8dB).
- Focus controls the exact frequency of the “Clean Up” cut (200 – 800 Hz).
- De-Ess decreases the threshold of the de-esser (0 – -40dB).
- Reverb is a simple dry/wet control to add space (0 – 50%).
- Delay is also a dry/wet knob for the delay (0 – 40%).
Basic Chord Rack
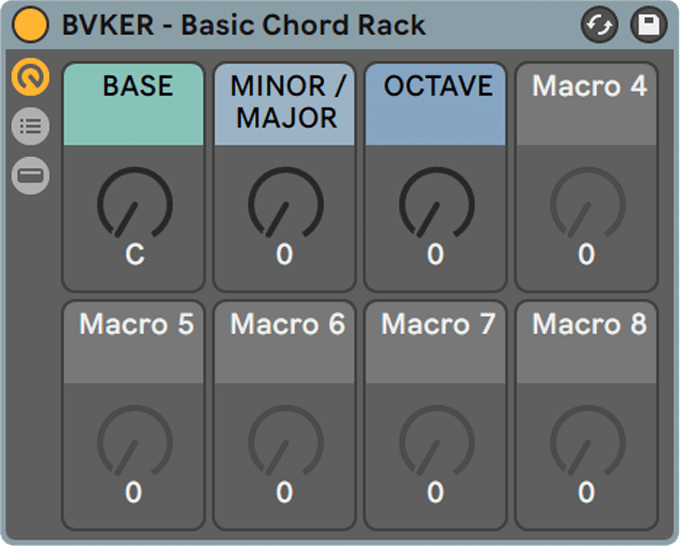
The chord rack is meant for producers who are new to music theory. Placing it on a MIDI track it will automatically create a fitting triad, based on the key you’ve selected. Additionally you can enable the octave function via macro 3. Since the rack doesn’t cover inversion I’d recommend resampling the MIDI. Afterwards you can try to transpose single notes of each chord an octave up or down.
- Base shifts the origin of the scale (default is C)
- Minor/Major switches the minor scale to a major scale.
- Octave adds an octave of the fundamental tone.
1 Knob Wash Out
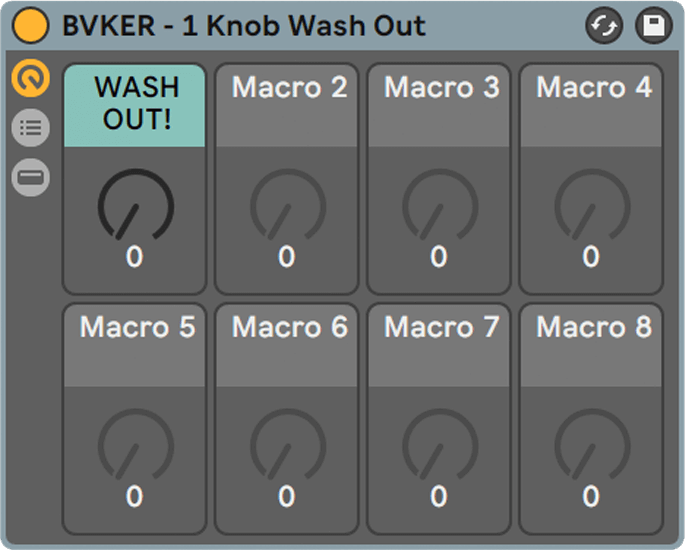
My 1 Knob Wash Out is actually inspired by the famous Bass Kleph Easy Washout. It one has one macro (Wash Out!), which is meant to be automated. You can slap it on your master, groups or individual tracks to create huge build ups and transitions.
“Wash Out!” controls a total of 6 parameters:
- High-pass frequency (26 – 932 Hz)
- High-pass resonance (0 – 30%)
- Echo dry/wet (0 – 40%)
- Reverb dry/wet (0 – 60 %)
- Stereo Width (100 – 80%)
- Gain (0 – 5db)
Easi 808
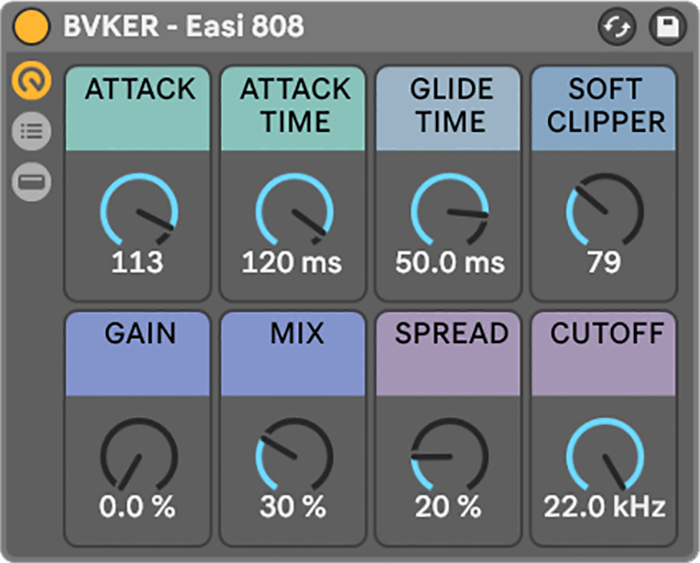
My “Easi 808” is the only instrument rack in this list and just like most 808 presets it’s based on a simple sine wave. You can adjust things like attack, glide time, distortion and cutoff. There’s even a mono compatible chorus effect built in.
- Attack increases the pitch envelope and decreases the attack time (0 – 80%).
- Attack Time adjusts the pitch envelope’s duration (20 – 140 ms).
- Glide Time sets the time a slide from one note to another takes (0.10 – 200 ms).
- Soft Clipper increases the Soft Clipper’s input gain (70 – 100).
- Gain adjusts the amount of distortion (0 – 20 %).
- Mix adjusts the balance between the clean and distorted signal (0 – 100 %).
- Spread detunes frequencies above 150 Hz (0 – 100%).
- Cutoff sets the low-pass filter’s cutoff (10 Hz – 22 kHz).
LoFi Rack
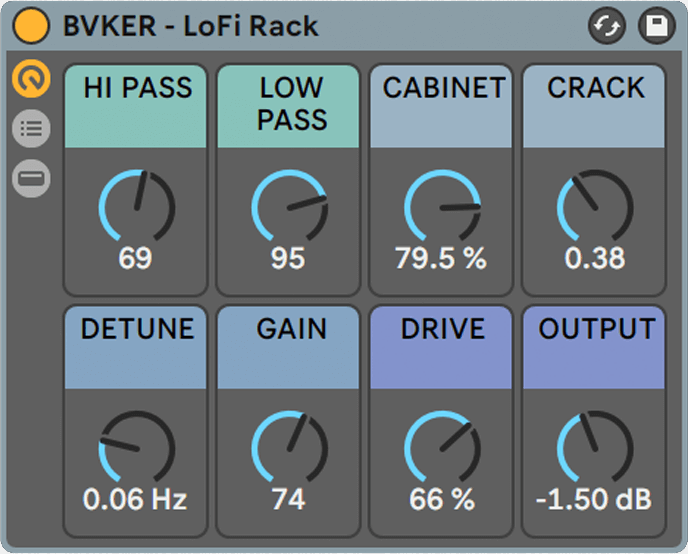
My LoFi rack emulates a bunch of characteristics and effects that are typical for vintage studio gear. You can use it to detune your source sound, decrease the frequency range, add distortion and vinyl crackles. If you produce LoFi and don’t want to spend 80 bucks on the RC-20 Retro Color you should definitely try out this one!
- Hi Pass adjusts the frequency of the high-pass filter (100 Hz – 1kHz).
- Low Pass controls the low-pass filter’s cutoff (500 Hz – 22kHz).
- Cabinet adjusts the balance between the Cabinet’s dry/wet (0 – 100%).
- Crack increases the volume of vinyl crackles (0 – 1).
- Detune increases the amount of detuning (0 – 17.2 Hz).
- Gain sets the input and output gain for Ableton’s Pedal (-35 – 35dB).
- Drive adjusts the dry/wet of Ableton’s Pedal (0 – 100%).
- Output controls the overall output volume of this rack (-10 – 10dB).
Reverb Rack

What bothers me the most about Ableton’s Reverb is that changing settings, such as room size or decay will also change the Reverb’s volume. That’s why I added 2 utilities to this rack which automatically counter those changes. Furthermore, you’ll get two independent controls for dry and wet instead of only one knob. To top things off you’ll get 2 filters, so you have control over Reverb’s frequency range.
- Dry controls the volume of the dry signal (-inf – 6dB).
- Wet adjusts the volume of the wet signal (-inf – 6dB).
- Size controls the room size (0.22 – 500).
- Time sets the decay time (200ms – 6s).
- Pre sets the pre-delay time (0.5ms – 100ms).
- Width controls how stereo the reverb is (0 – 120).
- High Pass adjusts the frequency of the high-pass filter (150 Hz – 1kHz).
- Low Pass controls the frequency of the low-pass filter (300 Hz – 10kHz).
Recommended: Speaking of reverb you might like this smart:reverb review.
Sauce Rack
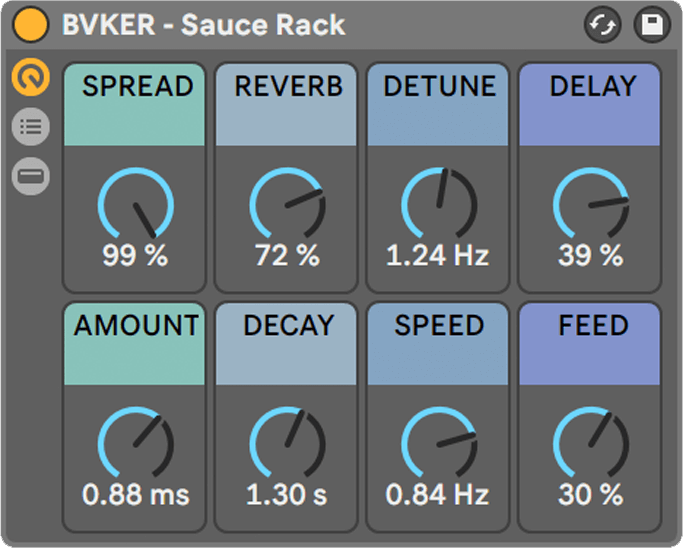
My “Sauce Rack” is something I like to add to most of my Trap and Hip Hop melodies. It comes with 4 different effects, adding stereo modulation, reverb, pitch modulation and delay. For each of those effects you get 2 macros so you can adjust them to your liking.
- Spread controls the dry/wet parameter of Ableton’s Chorus (0 – 99%).
- Amount sets the modulation amount in milliseconds (0 – 2.17ms)
- Reverb controls the Reverb’s dry/wet (0 – 100%).
- Decay adjusts Reverb’s decay time (200ms – 5s).
- Detune adjusts the amount of frequency shift modulation (0 – 15.1Hz).
- Speed sets the speed of frequency shift modulation (0.01 – 3.73 Hz)
- Delay controls Echo’s dry/wet (0 – 50%).
- Feed controls Echo’s feedback (0 – 50%).
Soft Clipper
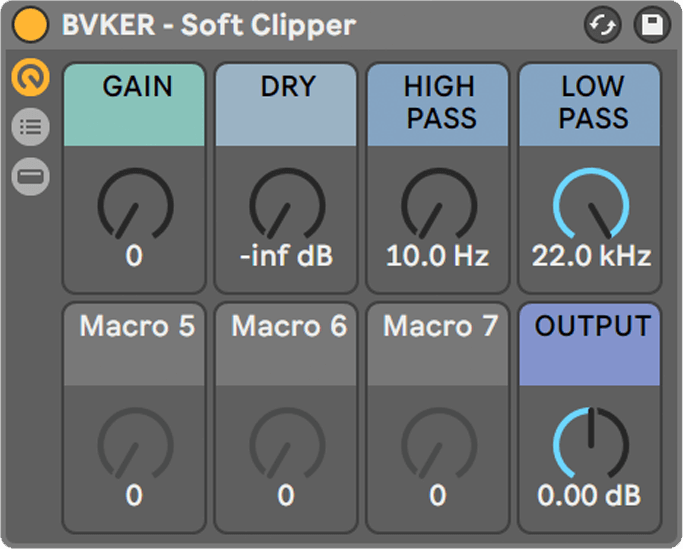
Ableton’s Glue Compressor, comes with a cool soft clipping feature, which works wonders on Trap and Hip Hop kicks. Problem? The output volume drastically changes when you increase the gain. With this Ableton effect rack you can drive the input gain and afterwards adjust the output so true bypassing is possible. You can also filter the wet signal or mix in the dry sound.
- Gain increases or decreases the input and output gain (-35 – 35 dB).
- Dry increases the volume of the dry signal (-inf – 6dB).
- High Pass sets the frequency of the high-pass filter (10 Hz – 10kHz).
- Low Pass sets the low-pass filter’s cutoff (200 Hz – 22kHz).
- Output adjusts the output gain (-10 – 10dB).
Easi Sidechain
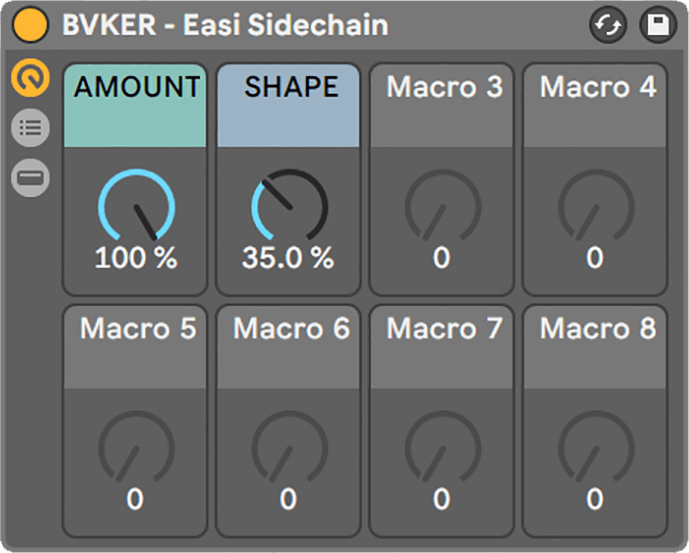
My “Easi Sidechain” rack comes with 2 controls, empowering you to sidechain any track within seconds. Just keep in mind that this rack is only suitable for 4-to-the-floor house and techno beats, since it’s LFO based. If you own a copy of LFO Tool you probably won’t need this one.
- Amount adjusts the amount of volume modulation applied to the incoming signal (0 – 100%).
- Shape changes the modulation curve (0 – 100%).
Gain Rack
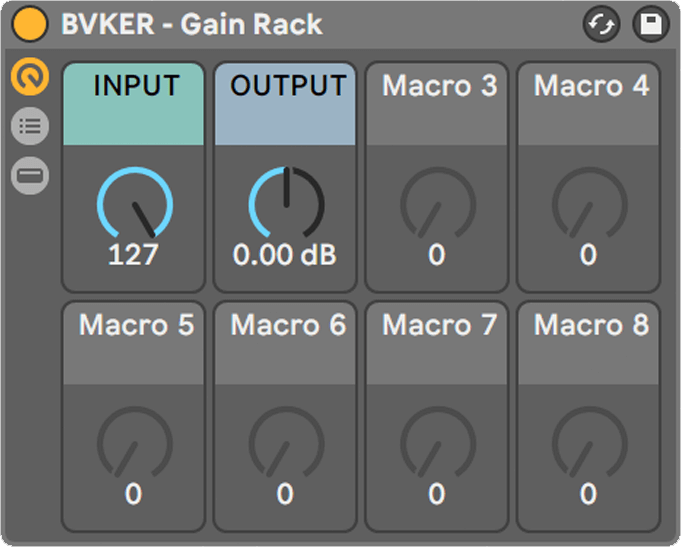
My “Gain Rack” doesn’t have any effects loaded yet, but it allows you to simultaneously crank up the input and reduce the output gain. Obviously this only makes sense if you place another effect between the two utilities.
- Input boosts the input gain and attenuates the output gain (-35 – 35dB).
- Output boosts or attenuates the output gain (-inf – 35dB).
Conclusion
So as you can see, Ableton Racks are really useful, and you can use them to build some amazing multi-effects. If you haven’t downloaded those racks yet, make sure to get your copy now. It’s free 😉